> ## Documentation Index
> Fetch the complete documentation index at: https://wb-21fd5541-docs-2626.mintlify.site/llms.txt
> Use this file to discover all available pages before exploring further.
# NVIDIA NeMo Inference Microservice 배포 작업
> 확장 가능한 모델 서빙을 위해 W&B Launch를 사용해 W&B 모델 artifact를 NVIDIA NeMo Inference Microservice에 배포합니다.
이 가이드에서는 W\&B의 모델 artifact를 NVIDIA NeMo Inference Microservice(NIM)에 배포하여 확장 가능한 추론를 위해 모델을 서빙하는 방법을 설명합니다. 이를 위해 W\&B Launch를 사용합니다. W\&B Launch는 모델 artifact를 NVIDIA NeMo Model 형식으로 변환한 뒤, 실행 중인 NIM/Triton 서버에 배포합니다. 이렇게 하면 수동 변환 없이 추적된 W\&B 모델을 바로 프로덕션 환경에서 사용할 수 있는 엔드포인트로 가져갈 수 있습니다.
W\&B Launch는 다음 호환 모델 유형을 지원합니다:
* [Llama2](https://llama.meta.com/llama2/)
* [StarCoder](https://github.com/bigcode-project/starcoder)
Deployment time varies by model and machine type. The base `Llama2-7b` config takes about 1 minute on Google Cloud's `a2-ultragpu-1g`.
## 퀵스타트
다음 단계에 따라 launch queue를 만들고, 배포 작업을 등록하고, 에이전트를 실행한 다음, 배포를 제출하세요.
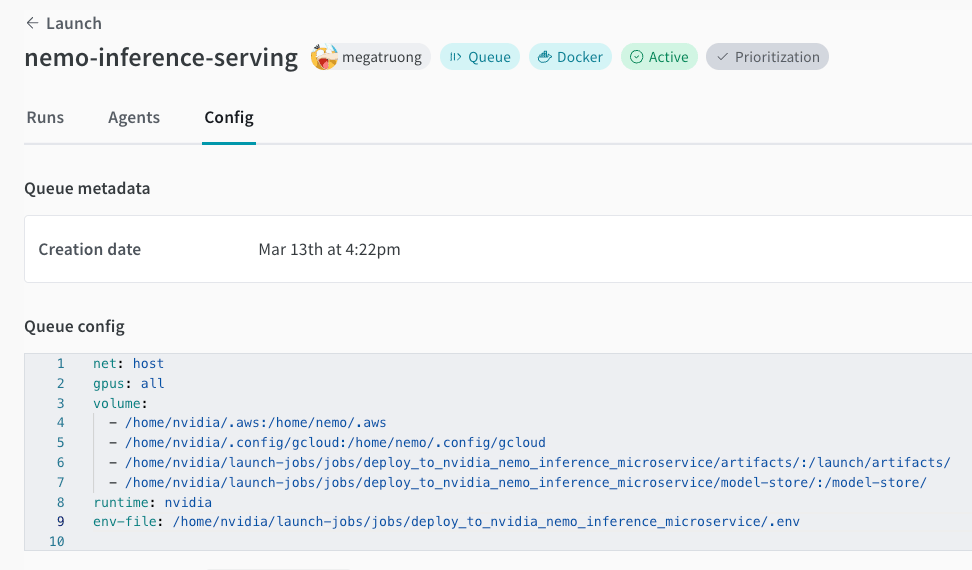
1. 아직 없다면 [launch queue를 만드세요](/ko/platform/launch/add-job-to-queue/). 큐는 작업이 GPU 머신에서 실행되는 방식을 정의합니다. 다음 예시 큐 설정을 참조하세요.
```yaml theme={null}
net: host
gpus: all # 특정 GPU 집합을 지정하거나, 전체를 사용하려면 `all`을 사용할 수 있습니다
runtime: nvidia # nvidia 컨테이너 런타임도 필요합니다
volume:
- model-store:/model-store/
```
 2. 프로젝트에서 이 작업을 만드세요. 이렇게 하면 배포 작업 코드가 W\&B 프로젝트에 등록되어 Launch에서 이를 실행할 수 있습니다.
```bash theme={null}
wandb job create -n "deploy-to-nvidia-nemo-inference-microservice" \
-e $ENTITY \
-p $PROJECT \
-E jobs/deploy_to_nvidia_nemo_inference_microservice/job.py \
-g andrew/nim-updates \
git https://github.com/wandb/launch-jobs
```
3. GPU 머신에서 에이전트를 시작하세요. 에이전트는 큐를 폴링하고, 제출되면 배포 작업을 실행합니다.
```bash theme={null}
wandb launch-agent -e $ENTITY -p $PROJECT -q $QUEUE
```
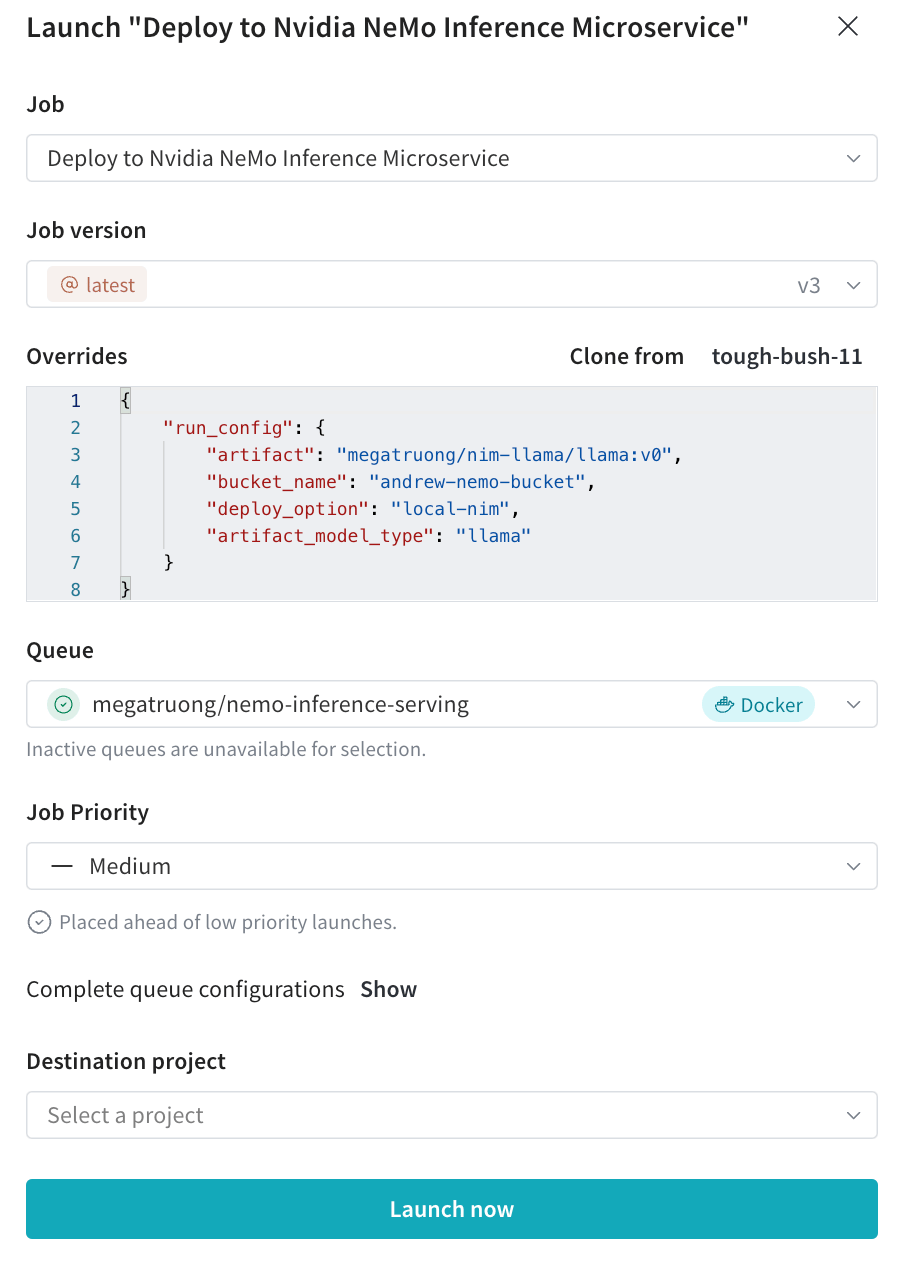
4. 원하는 설정으로 [Launch UI](https://wandb.ai/launch)에서 배포 launch 작업을 제출하세요. CLI를 통해서도 제출할 수 있습니다.
```bash theme={null}
wandb launch -d gcr.io/playground-111/deploy-to-nemo:latest \
-e $ENTITY \
-p $PROJECT \
-q $QUEUE \
-c $CONFIG_JSON_FNAME
```
2. 프로젝트에서 이 작업을 만드세요. 이렇게 하면 배포 작업 코드가 W\&B 프로젝트에 등록되어 Launch에서 이를 실행할 수 있습니다.
```bash theme={null}
wandb job create -n "deploy-to-nvidia-nemo-inference-microservice" \
-e $ENTITY \
-p $PROJECT \
-E jobs/deploy_to_nvidia_nemo_inference_microservice/job.py \
-g andrew/nim-updates \
git https://github.com/wandb/launch-jobs
```
3. GPU 머신에서 에이전트를 시작하세요. 에이전트는 큐를 폴링하고, 제출되면 배포 작업을 실행합니다.
```bash theme={null}
wandb launch-agent -e $ENTITY -p $PROJECT -q $QUEUE
```
4. 원하는 설정으로 [Launch UI](https://wandb.ai/launch)에서 배포 launch 작업을 제출하세요. CLI를 통해서도 제출할 수 있습니다.
```bash theme={null}
wandb launch -d gcr.io/playground-111/deploy-to-nemo:latest \
-e $ENTITY \
-p $PROJECT \
-q $QUEUE \
-c $CONFIG_JSON_FNAME
```
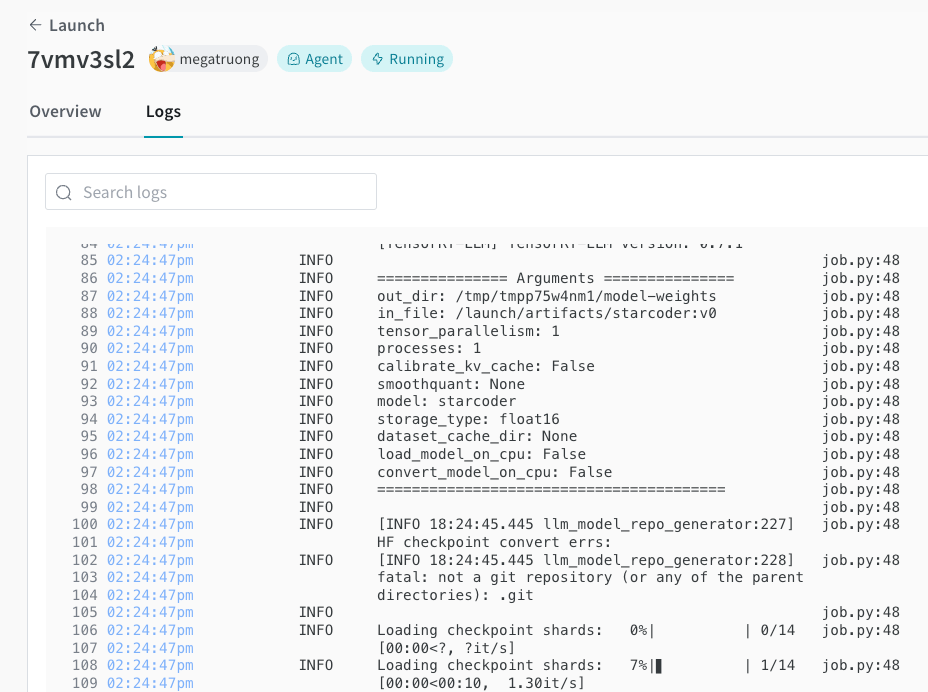
 5. Launch UI에서 배포 진행 상황을 추적할 수 있습니다.
 6. 배포가 완료되면 NIM/Triton 엔드포인트가 모델을 서빙하며, 추론 요청을 받을 준비가 됩니다. 모델을 테스트하려면 엔드포인트에 `curl` 요청을 보내세요. 모델 이름은 항상 `ensemble`입니다.
```bash theme={null}
#!/bin/bash
curl -X POST "http://0.0.0.0:9999/v1/completions" \
-H "accept: application/json" \
-H "Content-Type: application/json" \
-d '{
"model": "ensemble",
"prompt": "Tell me a joke",
"max_tokens": 256,
"temperature": 0.5,
"n": 1,
"stream": false,
"stop": "string",
"frequency_penalty": 0.0
}'
```
6. 배포가 완료되면 NIM/Triton 엔드포인트가 모델을 서빙하며, 추론 요청을 받을 준비가 됩니다. 모델을 테스트하려면 엔드포인트에 `curl` 요청을 보내세요. 모델 이름은 항상 `ensemble`입니다.
```bash theme={null}
#!/bin/bash
curl -X POST "http://0.0.0.0:9999/v1/completions" \
-H "accept: application/json" \
-H "Content-Type: application/json" \
-d '{
"model": "ensemble",
"prompt": "Tell me a joke",
"max_tokens": 256,
"temperature": 0.5,
"n": 1,
"stream": false,
"stop": "string",
"frequency_penalty": 0.0
}'
```